All photos by Anders Straarup on 14 SEP 2019 at The Yorkshire Air Museum.
![]() Halifax
Mk III at YAM
77 SQN links*Halifax-Yorkshire
Air Museum*Halifax-RAF
Museum*Halifax-BC
Museum.Canada*Halifax
Print Upd
04 OCT 2019
Halifax
Mk III at YAM
77 SQN links*Halifax-Yorkshire
Air Museum*Halifax-RAF
Museum*Halifax-BC
Museum.Canada*Halifax
Print Upd
04 OCT 2019
All photos by Anders Straarup on 14 SEP 2019 at The Yorkshire
Air Museum.
|
|
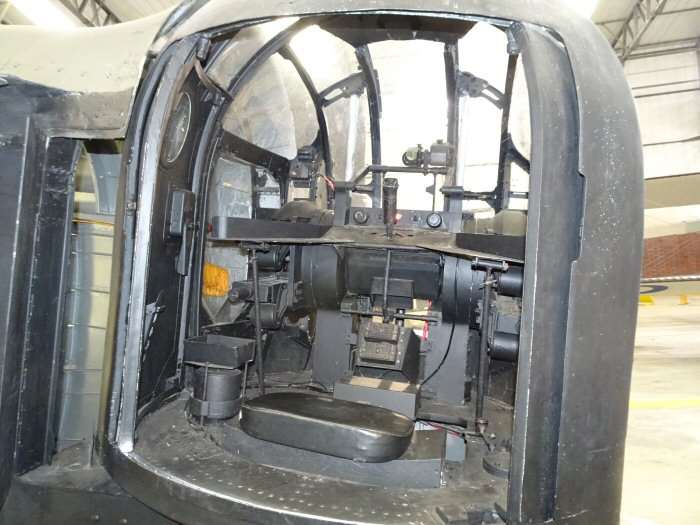 Tårnet er roteret, så vi kunne kigge ind. Hvis agterskytten skulle ud i en fart, skulle han dreje tårnet, så det pegede lige bagud, åbne skydedørene bag sædet, få fat i faldskærmen i det tilstødende rum og fæstne den i seletøjet. Hans valg om han derpå ville ud af flyet længere fremme eller om han ville rotere tårnet og kaste sig ud. Fotos og detaljer i Rear Gun Turrets.
|